

In a world filled with fast food and pre-packaged convenience, there’s something undeniably comforting and rewarding about baking your own bread. More than a culinary task, it’s a therapeutic ritual, a way to slow down and reconnect with the basics. Recently, baking at home has seen a remarkable resurgence, with people seeking hands-on ways to create delicious, wholesome food. This guide explores the benefits of homemade bread, the essential tools and ingredients, and a step-by-step process to help beginners get started with confidence.
Why Bake Your Own Bread?
You don’t know how exactly the bread you purchase from a mart is made. So, here are some of the amazing benefits of making your own bread. Besides, in the times of crisis, this might be the most useful skill to possess.
- Superior Freshness and Flavor
Nothing beats the smell of fresh bread straight from the oven. Unlike store-bought loaves laden with preservatives, homemade bread is free from additives and has a richer, more nuanced flavor.
- Healthier Choices
By baking your own bread, you control what goes into it. Use whole grains, seeds, and less sugar or salt to create loaves that meet your dietary goals.
- Budget-Friendly
With just a few pantry staples, you can make multiple loaves at a fraction of the cost of artisan bakery bread.
- Emotional and Mental Benefits
Baking can reduce stress, promote mindfulness, and offer a sense of accomplishment, especially when shared with loved ones.
- Bonding Through Baking
Making bread together is a fun, hands-on way to connect with family and friends, creating cherished memories along the way.
Basic Ingredients and Equipment You’ll Need
Essential Ingredients:
- Bread or all-purpose flour (unbleached recommended)
- Yeast (active dry or instant)
- Salt
- Water
- Sugar or honey (optional)
- Add-ins: seeds, nuts, dried herbs, spices, etc.
Recommended Equipment:
- Large mixing bowls
- Measuring cups and spoons
- Dough scraper or silicone spatula
- Stand mixer with dough hook (optional, but useful)
- Loaf pan or baking stone
- Oven (preheated accurately)
- Clean towel or plastic wrap for proofing
Pro Tip: Always use fresh yeast and high-quality flour. The difference in texture and flavor is well worth the slight increase in cost.
Beginner’s Step-by-Step Guide to Baking Bread

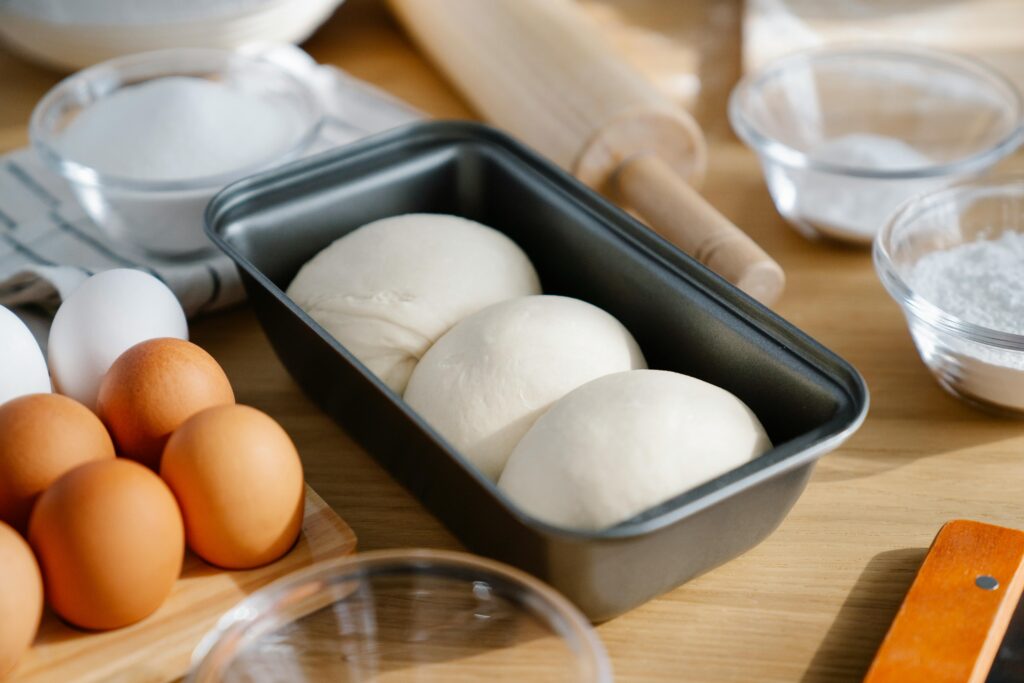
Step 1: Mix and Knead
- Combine flour, yeast, salt, and water in a large bowl.
- Mix until a shaggy dough forms. Knead by hand or with a mixer for 8–10 minutes until smooth and elastic.
- Let the dough rise in a greased bowl covered with a towel for about 1–2 hours, or until doubled in size.
Step 2: Shape and Proof
- Punch down the dough gently to release air.
- Shape into your desired form: round boule, baguette, or sandwich loaf.
- Place on a floured surface or baking tray, cover, and allow to rise again for 30–60 minutes.
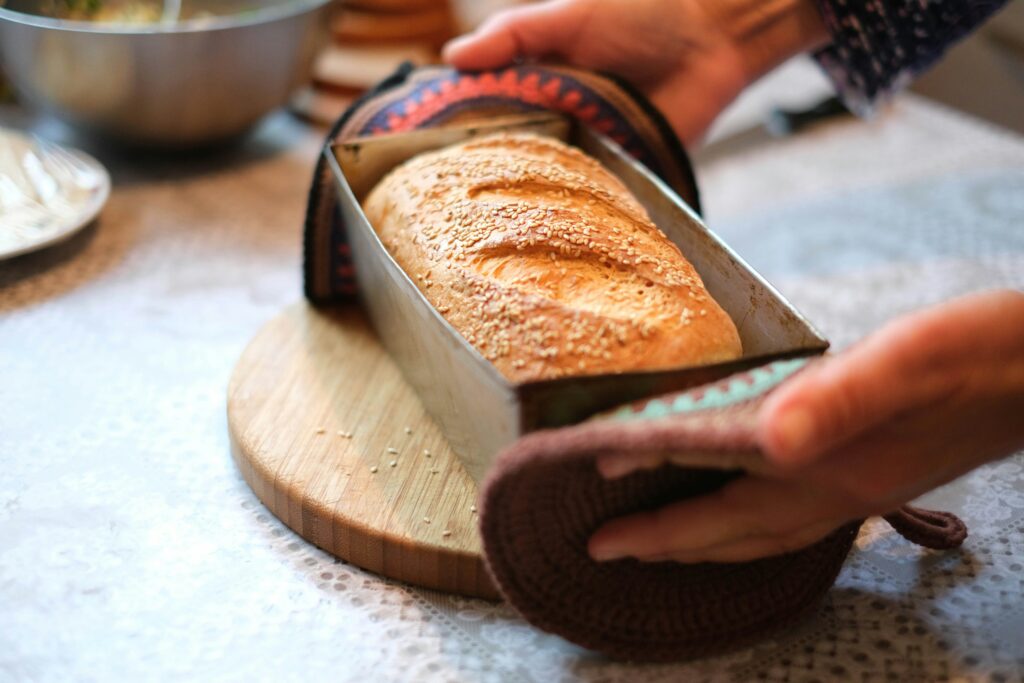
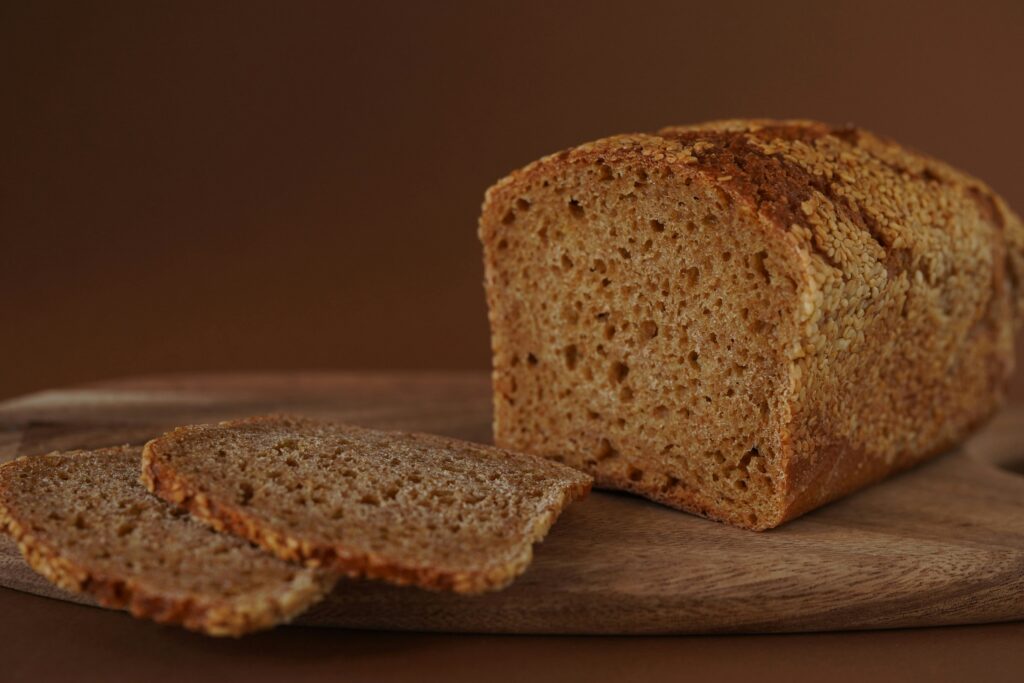
Step 3: Bake to Perfection
- Preheat your oven to 375°F (190°C).
- Bake for 25–35 minutes or until the crust is golden and the loaf sounds hollow when tapped.
- Let the bread cool completely on a wire rack before slicing.
Tips to Improve Your Bread Baking

- Start Simple: Master a basic white or whole wheat recipe before branching out into artisan or sourdough breads.
- Avoid Overmixing: Mix just until the dough comes together to avoid a dense loaf.
- Experiment Mindfully: Try adding rosemary, caraway seeds, or cinnamon raisins for a personal touch.
- Track Your Progress: Keep a baking journal with notes about timing, temperature, and changes for better consistency.
- Clean Workspace: Keep your counter floured but not overly so to prevent sticking.
Exploring Bread Styles and Cultural Traditions
Bread takes many forms around the world. Once you’re comfortable with the basics, try:
- French Baguette: Light, crisp, and chewy.
- Italian Focaccia: Flavored with olive oil and herbs.
- Middle Eastern Pita: Perfect for sandwiches or dips.
- Indian Naan: Soft and rich, great with curry.
- German Rye (Roggenbrot): Hearty and flavorful, made with rye flour.
Baking these breads is also a journey through culture, giving you a literal and figurative taste of the world.
How to Store Homemade Bread
Homemade bread doesn’t contain preservatives, so storing it properly is essential:
- Short-Term (1–3 Days): Keep in a bread box or wrapped in a clean cloth.
- Medium-Term (3–7 Days): Wrap in foil and keep in a cool, dry place.
- Long-Term (Freezing): Slice and freeze individual portions in freezer bags. Toast or microwave to thaw.
Avoid storing in the fridge, as it dries out bread faster.
Final Thoughts
Homemade bread isn’t just food—it’s a craft, a ritual, and an expression of care. Whether you’re kneading dough on a quiet Sunday morning or sharing a warm loaf at dinner, you’re participating in a tradition that’s as nourishing as it is timeless. So roll up your sleeves, preheat the oven, and let your kitchen be filled with the irresistible aroma of fresh, homemade bread.